Module 1: Getting VR Ready: Devices, Accounts, and Setup
Enable instructors to independently set up, configure, manage, and maintain VR headsets and accounts without relying on technical staff.
Types of VR accounts (Meta Quest)Reference
On Meta Quest you can use different types of accounts depending on context: personal or institutional. Choosing the right one avoids management issues and aligns with your institution's policies.
Summary
- Personal account: one user per account; it can be used in class with a simple setup. It is also possible to share one account across multiple headsets, with limitations.
- Institutional account (Meta Horizon Managed Services): managed by the institution from work.meta.com. Allows centralised management of devices, apps and users. This is the recommended option for headset fleets in educational settings.
 Click to enlarge
Personal accountReference
A personal Meta account is an individual account tied to one user. It can be used in the classroom: setup is simpler and does not require enterprise services.
Headset setup and account creation
The process includes powering on the headset, choosing language, connecting to Wi‑Fi, and creating or signing in with a Meta account. You can follow official guides such as:
Sharing a personal account (pros and cons)
If several people use the same personal account across different headsets:
- Pros: fewer accounts to manage, same content and apps across headsets.
- Cons: limits on account sharing, risk of mixing data and violating terms of use. Document good practices (who uses which headset, avoid changing passwords without notice) and be aware of Meta’s limits on shared use.
Note: If you manage more than a few headsets, consider using an institutional account with Meta Horizon Managed Services to avoid these issues.
Institutional accountReference
Institutional accounts are managed with Meta Horizon Managed Services (formerly Work for Meta) (work.meta.com) for education and work. They allow centralised management of devices, apps and users, removing the need to manage personal accounts and emails on each headset. Once the platform is configured, all the headaches with individual device setup are gone: adding new apps, removing apps, assigning app groups to specific institutions... everything becomes much simpler.
Note: As of February 2026, Meta Horizon Managed Services (HMS) is free for all deployments — there is no cost for institutions to use the platform. HMS is supported until January 2030.
Step 1 — Create a business or education account
The first step is to create the account at work.meta.com. It can be set up as a business or education account. Once created, you access the admin dashboard where everything is managed: devices, people, apps, templates and groups.
Click to enlarge
Step 2 — Add people to the system
Next, add people to the organisation. Meta Horizon Managed Services has a comprehensive role system: administrators, collaborators, etc. Each person can have different permissions depending on their function.
Recommendation: If an external team will handle part of the configuration, the institution can simply create the account, invite the technical team as administrators by email, and assign them the necessary roles. Once everything is configured, the institution can independently manage simpler tasks like adding new devices or linking apps.
 Click to enlarge
Step 3 — Add applications
Before creating templates or groups, it is recommended to add the apps you will use. When adding apps to the platform, keep in mind:
- Apps must be Private Apps or published on Meta as free and open.
- Paid apps cannot be added, nor can apps in Alpha or Beta channels.
- The HMS account is not a developer account. They are independent profiles.
How does the app addition process work?
- The HMS administrator provides the organisation KEY to the developer.
- The developer sends an invitation from their development channel using that KEY.
- The organisation accepts the invitation from the admin panel.
- The app appears in the applications list, ready to be assigned to templates, groups or devices.
For third-party accounts, the process is the same: they send their organisation KEY so the developer can send them the invitation.
 Click to enlarge
Once added, apps are managed from the "Applications and content" panel:
 Click to enlarge
Step 4 — Create a device configuration template
The template defines how devices are configured when activated. Here you set:
- Whether a PIN is required or not.
- Whether an email is required or not.
- Which apps are installed by default on devices using this template.
The template greatly simplifies the setup for the end user: with a good template, getting a Quest up and running is very straightforward, with no need for emails or PINs.
Tip: If there is only one template, it is assigned by default to all devices when they are added, simplifying the process even further. Apps can be assigned directly from the template itself.
 Click to enlarge
Step 5 — Create device groups
Groups allow you to organise devices logically, for example: "Headsets for School X", "Headsets for Training Centre Y", etc. Each group can have specific apps and templates assigned.
You can also:
- Unlink devices from a group.
- Move a device to a different group.
- Assign different apps to each group.
 Click to enlarge
How to activate the headsets?
There are two methods for activating devices. Both link the headset to the organisation and apply the configured template and apps.
Method A — Via Wi-Fi (no cable)
To configure headsets via Wi-Fi you need: an internet connection, the headset to activate, and a PC with the work.meta.com dashboard open in the browser.
- Charge the headset and insert batteries into the controllers.
- In the PC browser, go to the "Activate Devices" section.
 Click to enlarge
- On the headset: select the language and Wi-Fi password. The device update begins (installs the latest OS version, etc.).
- In a later step, the button "Have an organisation manage this device" appears. The headset restarts.
- The button "Connect to your organisation" appears and 6 digits are displayed on screen (e.g. ABC-DEF).
- In the PC browser, enter that 6-digit code.
 Click to enlarge
- Both sides connect. The headset indicates it is linking and the browser shows the same. After a few seconds, both confirm "Linked to the organisation".
- In the browser, the linked device now appears. It can be assigned to groups, templates, etc. from the admin panel.
 Click to enlarge
- On the headset, the assigned apps appear automatically: they update and install on their own.
 Click to enlarge
Method B — Via USB cable (headset off)
It is possible to configure the headset without powering it on for the first time. You need:
- A Windows or Mac PC.
- The USB cable to connect to the computer.
- The PC must have Bluetooth. Without it, pairing is not possible.
Steps:
- Download the Meta Horizon device configuration tool for PC or Mac. The download links are inside the web platform's admin panel. On Windows, once installed a security alert may appear; simply accept the exception.
 Click to enlarge
- The headset must be powered off. Connect it to the PC via USB cable.
 Click to enlarge
- Once connected, press the power button and volume-down button simultaneously. The "boot" menu appears on the headset.
- At that point, the PC tool detects the headset. Click "Link" and fill in the requested details: Wi-Fi network name and password. Everything installs automatically.
 Click to enlarge
- The update and configuration process starts on the headset. There is absolutely nothing to do on the headset itself; everything is done from the PC.
- Once linked, a template is chosen for the device, just like with the Wi-Fi method. That template pushes the predefined configuration: whether a PIN is needed, whether an email is needed, and the app group selected on the platform.
- As a result, when you power on the headset, everything is already configured: the assigned apps have been installed automatically.
 Click to enlarge
Things to keep in mind
- Resetting a device: to unlink a headset and link it to another organisation or release it, simply use the "Delete Device" option in the admin panel. The headset performs a factory reset and starts from scratch.
- Two parallel workflows: app publishing through the developer channel (DEV) remains the same process. But HMS is an independent profile for managing devices and apps at scale.
Official resources
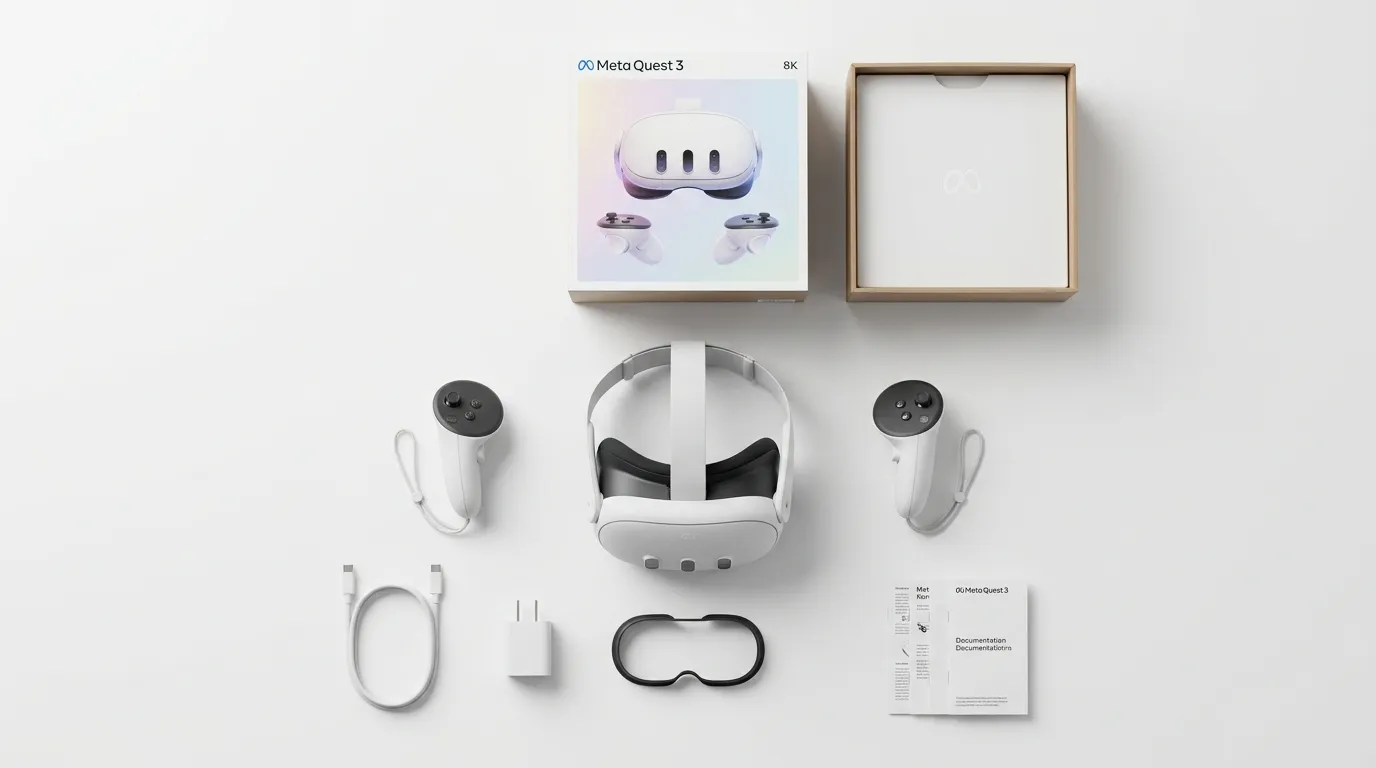
Getting started: in the box, how to wear, IPD, languageEssential
Before using the headset in class, it helps to master the basics: what’s in the box, how to wear it, IPD, and language.
In the box and first steps
- Follow the Get started with Meta Quest 3 guide.
- Correct headset placement, strap adjustment, and lens position.
- Adjustable lenses: Quest 3 allows you to vary the interpupillary distance by gently sliding the lenses. A numeric indicator between the lenses will show the selected position.
- Straps and facial adjustment: the top and side straps are adjustable. By combining the adjustment of these with the tilt of the headset on your face, you can find the optimal position for clear and comfortable vision.
- IPD (interpupillary distance): adjust the wheel between the lenses so the image is not blurry or double; improves comfort.
- Language: set it in Settings so students see the interface in the course language.
Age requirements
Meta Quest headsets have a minimum age requirement of 10 years. Children aged 10-12 must use a parent or guardian-managed Meta account. Users aged 13 and older can create and manage their own Meta account. Keep these requirements in mind when planning classroom use with younger students.
Wearing with glasses
Meta Quest 3 and 3S can be used with prescription glasses of reduced dimensions, according to manufacturer specifications, and include an accessory that increases the space between the VR headset and prescription glasses, avoiding pressure and increasing comfort. See Wear Meta Quest 3S with glasses for recommended distance and accessories (facial spacers).
 Click to enlarge
Meta Quest 3(S) in the classroomEssential
To use Meta Quest 3(S) in the classroom in an orderly and safe way, set up the headsets and space before class.
Headset setup
This includes powering on, account (personal or institutional), Wi-Fi, Boundary setup, and if applicable, pairing with the mobile app for management and casting.
Connectivity and dataEssential
Connecting the headset to WiFi is the first step of the setup before every session. Without WiFi you can’t cast, install apps, or update the system. Additionally, the headset and your device (phone, Chromecast) must be on the same network for casting to work.
How to connect the headset to WiFi — step by step
-
Turn on the headset and put it on.
-
Press
 the Meta button on the right controller to open the Navigator.
 -
Select
 Quick controls.
 Click to enlarge
 -
Select Wi-Fi.
 Click to enlarge
 -
Make sure the Wi-Fi toggle is turned on.
-
Find the Wi-Fi network you want to connect to and select Connect.
-
Enter the password if required.
-
Wait for the connection to complete. If you see the Wi-Fi icon in the top bar, you’re connected.
If the school network has strict restrictions (firewalls, captive portals, client isolation), casting may not work. Consider using a dedicated router for the headsets — it’s the most reliable solution in educational settings.
Classroom recommendations
- Always use the 5 GHz band if your router supports it — lower latency and better casting quality.
- Connect all headsets to the same network as the Chromecast and your phone.
- If using multiple headsets at once, check that the router supports the number of simultaneous devices.
- Run a connection test before class: open the headset browser and load any page to verify internet access.
Other connections
- Bluetooth: Connect a Bluetooth device to Meta Quest 3(S) (search for “Bluetooth” in official help). Useful for external headphones.
- PC connection (Windows): Connect Meta Quest 3(S) to a Windows computer (for file transfer or Link/Air Link).
- File transfer: Transfer files from a Windows PC to Meta Quest 3(S) (via USB cable or official tools).
Guardian (boundary) & settingsEssential
System settings let you adapt the headset to the space and user. The most important one before every session is the Boundary (formerly Guardian) — without it set up, the student could bump into walls or objects.
Boundary — step by step
The Boundary is the safety system that marks the zone where the student can move. The headset shows a virtual grid when they approach the edge, preventing them from hitting walls, furniture, or other students.
Suggested Boundary and automatic room scanning
Meta Quest 3/3S use their cameras to scan the environment and suggest a Boundary automatically based on the free space around you. The first time you open an app without a configured Boundary, the headset proposes one you can accept, edit, or replace.
Additionally, assisted Space Setup lets the headset quickly 3D-scan your environment to detect walls, tables, and furniture without you having to add them manually.
 Click to enlarge
Two modes available:
- Stationary: a fixed 1×1 m (3×3 ft) zone around the user. Created automatically when entering VR. Ideal for seated experiences or standing in place.
- Roomscale: a larger zone based on the room scan or drawn manually. Minimum recommended space: 2×2 m (6.5×6.5 ft) without obstacles. Recommended for most educational apps.
How to adjust or redraw the Boundary:
-
Press
the Meta button on the right controller to open the Navigator. -
Select
Quick controls > Settings. -
Select Environment setup > Boundary > Adjust boundary.
-
If the headset suggests a Boundary based on its scan, review it and accept if it fits the space. If not, choose Roomscale and draw manually: point the controller at the floor, pull the trigger, and trace the perimeter of the safe zone.
 Click to enlarge
 -
Confirm and you’re done. The grid will appear whenever the student approaches the edge.
To switch modes during an experience without leaving it:
Classroom tips
- Always review the suggested Boundary before accepting — the headset may not detect low obstacles or backpacks on the floor.
- If drawing manually, leave at least 50 cm (20 in) of margin from walls and furniture.
- If multiple students have headsets on at the same time, make sure their Boundary zones don’t overlap.
- The headset remembers Boundaries from previous spaces, but if you change rooms you’ll need to redo it.
- You can look down to see the outline of your play zone ("Glanceable Boundary" feature).
Resources
Other important settings
- Headset lights: indicate status (on, charging, updating). See What the lights on Meta Quest 3(S) mean.
- Passthrough: see the real environment through the cameras. Activate passthrough on Meta Quest 3(S).
- Hand tracking: use hands without controllers. Turn on hand tracking.
- Controllers: Pair controllers with Meta Quest 3(S). Many applications only use the right controller. Make sure it has battery (AA or rechargeable). When you move it or press any button, it should be automatically detected by the system.
- IPD: Change IPD on Meta Quest 3(S).
- Language: Supported languages and how to change language.
- Screen recording: Screen record with Meta Quest 3.
- Developer mode: only if you need to install apps from external sources. Activate developer mode.
- Updates: Update the operating system of Meta Quest 3(S). Updates are not downloaded automatically; to get them, you need to access the "Update" section within the app if new versions are available.
You can complement with a complete Quest 3S beginner’s guide (buttons and general use).
 Click to enlarge
Casting and external displayEssential
Casting is the most important step before handing the headset to a student. Without casting, you can’t see what the student is seeing — and if you can’t see what they’re doing, you can’t guide them or supervise the experience.
The headset preparation flow before every session is always the same:
- Connect to WiFi — the headset needs to be on the same network as your device.
- Set up the Boundary — define the safe movement area.
- Activate casting — stream the headset view to your phone, tablet, TV, or projector.
- Hand the headset to the student — only when you’re already seeing what they see.
If you don’t activate casting before handing over the headset, you’ll be flying blind. You won’t know if the student is in the right app, if they need help, or if something is wrong. Casting is not optional — it’s a required step.
Why you need it in the classroom
- Supervision: you see exactly what the student is doing without taking the headset off.
- Live guidance: you can give instructions while the student is inside the experience.
- Group participation: the rest of the students follow the activity on screen and can join the discussion.
Before you start — what you need
Before activating casting, make sure everything is ready:
- Same WiFi network for the headset and the receiving device (required).
- 5 GHz band recommended — reduces latency and improves image quality.
- Compatible receiving device: Meta Horizon app on phone/tablet, Chromecast connected to TV/projector, or a web browser.
- Headset charged (at least 30%) and paired with the Meta Horizon app on your phone.
How to activate casting — step by step
-
Make sure the headset and your device are connected to the same Wi-Fi network.
-
On the headset, press
the Meta button on the right controller to open the Navigator. -
Select
Quick controls.Click to enlarge -
Select Cast.
 Click to enlarge
 -
Select the device you want to cast to (phone, Chromecast, web, etc.).
 Click to enlarge
 -
Select Next and follow the on-screen instructions.
- If you choose Mobile: the stream appears directly in the Meta Horizon app on your phone.
- If you choose Chromecast: the image is shown on the connected TV or projector.
- If you choose Web: open horizon.meta.com/casting in a browser (Chrome recommended) on any computer or device connected to the same Wi-Fi network. You must be logged in with the same Meta account used on the headset.
 Click to enlarge
The Web option is very practical in the classroom: no app install needed, just a browser and the same Wi-Fi network. You can project straight from the teacher’s laptop. A delay of 1-3 seconds between what the student does and what appears on screen is normal. Keep this in mind when giving instructions: the student hears your voice before you see their action. Practice the timing before class.
Classroom tips
- Position the screen where all students can see it without moving from their seats.
- Use the 5 GHz band on your router. If the school network is unreliable, consider using a dedicated router for the headsets.
- Test casting before students arrive — avoid wasting class time troubleshooting technical issues.
- Prepare your narration: given the slight casting delay, plan what you’ll say while the student explores. Describing what’s on screen or asking the group questions works well.
- Phone-to-projector relay: if you don’t have a Chromecast, cast to your phone and then connect the phone to the projector via cable. It’s a simple alternative that works well.
Common issues
- Casting won’t start: check that the headset and the receiving device are on the same Wi-Fi network. If the network has "client isolation" (AP isolation) enabled, casting won’t work — check with IT.
- Black screen: restart the headset and the receiving device. Start casting again.
- High latency or choppy image: reduce network traffic (ask students to disconnect WiFi on their phones), move the headset closer to the router.
- Device not showing in the list: make sure the Chromecast is on and on the same network. Restart it if needed.
For a complete casting troubleshooting guide, see the Casting issues section in Module 6 (Solving Common VR Problems).
Mobile connectionReference
Connecting the headset to the Meta Horizon app on your phone makes daily management and casting easier.
Benefits
- Download and install apps on the headset from the phone.
- See battery status and headset settings.
- Start casting to a screen or projector with fewer steps.
- Manage multiple devices if you use several Quests.
How to do it
- Install the Meta Horizon app from App Store or Google Play.
- Power on the headset and open the app on your phone.
- Follow the pairing flow (Bluetooth and Wi-Fi); the headset will show a code or confirmation.
- Once linked, you’ll see the device in the app and can use the features above.
Organization and storageReference
Keeping headsets, controllers, and accessories organised reduces loss and extends the life of the equipment.
Good practices
- Labelling: mark each headset and its matching controller (number, colour, or code) so they are not mixed up.
- Usage log: note which headset each group or student used if needed for maintenance or incidents.
- Storage: store headsets in a fixed place, protected from impact and direct sunlight (sunlight can damage the lenses).
- Transport: use cases or carts designed for Quest when moving between rooms.
- Charging: use power strips or charging carts to charge multiple headsets at once; check that the LED indicates full charge.
References
SpecificationsReference
Knowing the headset specifications helps plan classroom use (space, battery life, compatibility).
Useful points
- Serial number: for warranty and inventory. Where to find it: see the model guide in the KB.
- Use with glasses: Wear Meta Quest 3(S) with glasses.
- Speakers and microphone: Quest 3(S) has both built in.
- Chipset, RAM, display, FOV, tracking, weight: Meta Quest 3(S) headset specifications, display specifications, tracking type, field of view, weight.
- Buttons and basic use: Use Meta Quest 3S buttons.
- Initial setup: How to set up Meta Quest 3(S).
Installing from the StoreEssential
The Meta Horizon Store (inside the headset or from the mobile app) is the main source of official applications.
Step-by-step installation
- Open the Store from the headset menu or from the Meta Horizon app on your phone.
- Search for the app by name or browse categories.
- Tap Get or Buy (depending on free or paid).
- Wait for download and installation to finish; the app will appear in the library.
Recommended apps for education
There are free and paid apps aimed at education: simulations, virtual visits, procedural training, etc. Check updated lists in the Store (Education category or similar) or in your institution’s resources.
Apps inside the headsetReference
Once installed, applications are managed from the headset (and from the mobile app if linked).
Check app version
In the headset library, select the app (usually via the three dots or “Info”) to see details; the installed version is usually shown there. Useful to ensure all headsets have the same version before class.
Uninstall an app
From the library, long-press the app icon and choose Uninstall (or Remove). You can also use the guide Delete applications on Meta Quest 3.
Accessing apps from the menu
From the Meta Quest 3 main menu, access the app bar. Using the controller trigger, open the installed applications window. In the top right corner, expand the categories menu and scroll down to "Unknown Sources" if your application does not appear in the main list. There you will find the app you want to use; select its icon or name to launch it.
App credentials vs headset account
App credentials (e.g. login inside the app) do not have to match the headset’s Meta account. Headsets can be on an institutional account while the app asks for a different educational login; manage those credentials according to your institution’s policy.
Note on app updates
The first time you open an application, it will launch directly. Updates are not downloaded automatically; to get them, access the “Update” section within the app if new versions are available.
Cleaning and maintenanceReference
Clean headsets and controllers after every use with a non-abrasive, non-alcoholic wipe. Clean lenses only with a dry microfiber cloth — never spray liquid directly on lenses. Allow surfaces to air-dry before the next user.
For complete cleaning workflows and hygiene protocols for shared classroom use, see Module 4: Safety, Wellbeing, and Accessibility.
AccessoriesReference
Optional accessories can improve comfort and durability in educational settings.
Where to find out more
Typical examples: alternative head straps, carry cases, facial spacers for glasses wearers, lens protectors. Choose according to use (classroom, transport, different users).
Pre-class technical checklistEssential
Going through this checklist before each session reduces technical failures and keeps the focus on the learning activity.
- Headsets charged: check that the LED indicates full charge (e.g. green at 100%).
- Apps opened and tested: have opened at least once the app you will use and confirmed it launches correctly.
- Boundary set: Boundary drawn and tested in the actual classroom space.
- Casting tested: if you will project, verify that the casting device (Chromecast, app, etc.) works with the headset.
- Plan B ready: have an alternative activity if VR fails (Wi‑Fi, app, or device).
Meta for EducationReference
Meta for Education is Meta's dedicated offering for schools and educational institutions, built on top of Meta Horizon Managed Services. After a beta phase starting in April 2024, it became generally available in February 2025.
Why it matters for schools
Meta for Education addresses the key pain points of managing VR headsets in educational settings: device management at scale, simplified casting, privacy-compliant identity, and predictable pricing.
Key features
- Facilitated Casting: cast and control up to 48 devices simultaneously from a single web-based dashboard — no need to cast one headset at a time.
- File management: distribute files, apps, and configurations across your headset fleet remotely.
- Kiosk mode: lock shared devices to specific apps or experiences, ideal for classrooms where students should only access the assigned activity.
- Privacy-first identity: identity solutions designed for educational contexts, so students do not need personal Meta accounts.
Pricing and availability
As of February 2026, Meta discontinued the dedicated education hardware bundles that were previously available. The current approach for schools is:
- Purchase consumer Quest headsets at standard retail pricing (Meta Quest 3, Quest 3S).
- Activate Meta Horizon Managed Services (HMS) for free — HMS is now free for all deployments and supported until January 2030.
This means there is no longer a separate "education SKU" to purchase. Schools buy the same hardware as consumers and then enable device management through HMS at no additional cost.
More information
Visit Meta for Education for full details, case studies, and to contact Meta about your institution.